|

|
|
|
|
||
Replacing a Diablo Clutch Rod
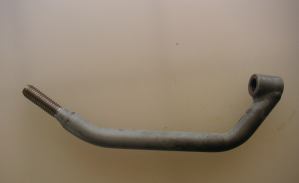
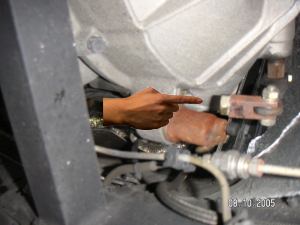
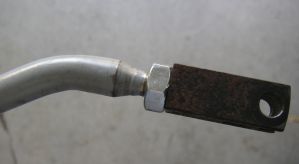
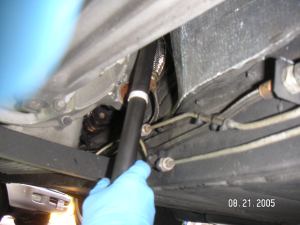
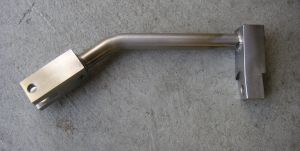
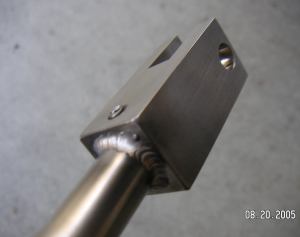
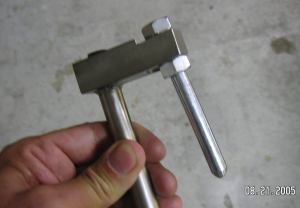
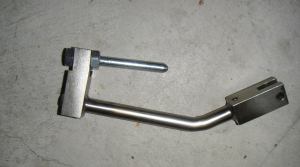
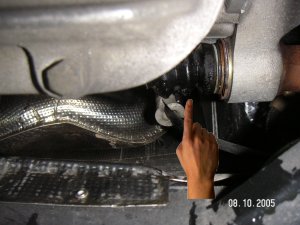
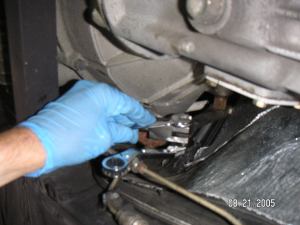
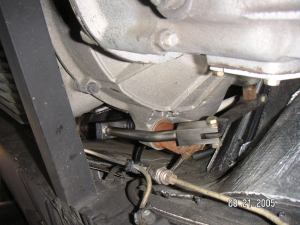
Not only that, because of the new position of the rod is bent about 5 degrees out of plain. This makes it difficult to make. The net result is on one hand a lighter clutch, but unfortunately the design is flawed. The region of the rod where the treads are is quite narrow as you can see in figure 1. Because of the high pressures involved, these rods have a tendency to brake right at the tread/rod boundary. Theses rods are in all Diablos from about 1995 onwards - even in the 6.0L Diablo. To make matters worse failure is immediate and with no warning. There is a sudden loss of clutch control. The pedal goes right to the floor. Further, if you continue to pump the clutch pedal, you will push the broken rod out of the cylinder dumping it on the road. The cylinder piston comes out of the cylinder (see below) and in 6.0L Diablos brake oil leaks out with each pump. The net effect being to reduce the oil in your brake master cylinder with potential for reduced brake function. (The reservoir will not empty completely because the tube supplying the clutch cylinder is positioned half way up the side of the brake reservoir allowing it to only half empty). Note in earlier cars the clutch master cylinder has its own reservoir. However a broken clutch rod like this is an emergency situation. As quick as possible pull the car over off the road. Reduce the accelerator pedal and let the car slow down, force the car out of gear and switch off the engine. The above and can be a harrowing experience. Having had this happen to me recently in a 2001 6.0L Diablo, I resolved to try and make sure it will not happen again. Below is a description of the problem with a few solutions. Figure 2 shows the problem. Unfortunately in my case I lost the broken rod. All that you can see is the part that connects it to the clutch lever. The Lamborghini replacement rod is shown in figure 1. It is part number 002134956. Unfortunately it still has the constricted narrow region near the treads. A simple work around is to put a number of thick washers as shown in figure 3 and 4 between the treads and the clutch lever to add strength to the region. (Thanks goes to Dave Ayers, Orangevale,CA. for that suggestion). This is a little bit more difficult than you might think since the width of all washers and nut must allow you to screw in the attachment piece so it fits tight and is at the right angle to attach it to the clutch lever in the car. There is quite a bit of trial an error involved. If the washers are loose they will have no effect. A spring washer is probably not much use either. This arrangement when done properly however will spread the strain over the region better. This strain is way more than you might think by the way. Out of curiosity I attached a pipe to the clutch lever as shown in figure 5 and pushed back on the clutch lever. It took a lot of force! It was interesting that once you got the clutch plates apart it is easier to push the lever further. I guess you need this force to deliver the torque for a car like this. No wonder we need two hydraulic cylinders. While I used the above arrangement for a few weeks I did not feel confident with the arrangement long term. Fortunately a fellow Lamborghini enthusiast John Custer (jcuster2@woh.rr.com) has made a much more robust rod. He has a just few and sells them for $400. It is shown in figures 6 and 7. As you can see in John's rod there are no treads where the rod attaches to the clutch lever. The whole thing is made of very strong steel and welded together. Again these rods are not easy to make. While it is difficult to see in the photographs, both ends are out of plain and at strange angles. So below is an account of my installing a "Custer clutch rod" in Diablo. I think it will work for all models 1995 to 2001.
Below is a diagram of the clutch cylinders arrangement.
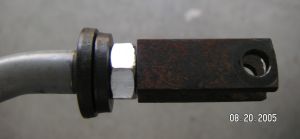
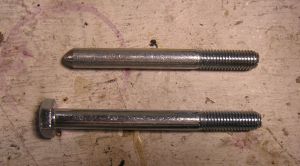
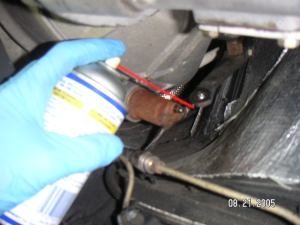
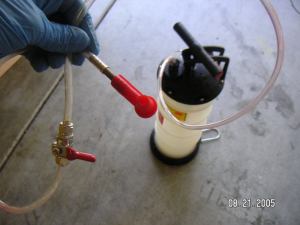
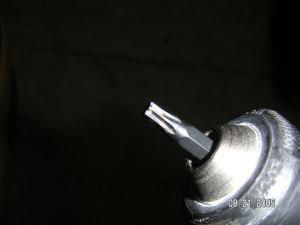
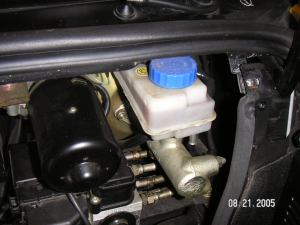
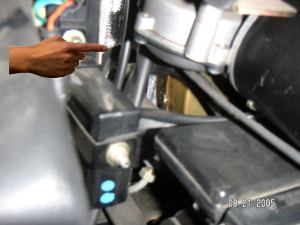
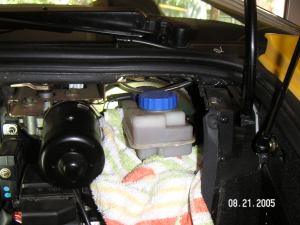
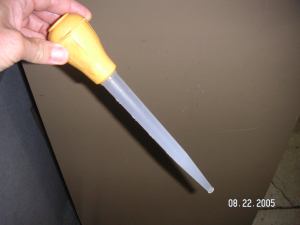
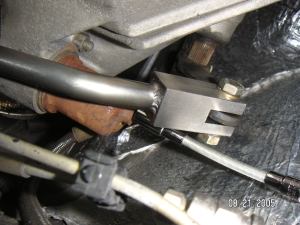
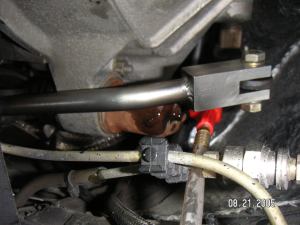
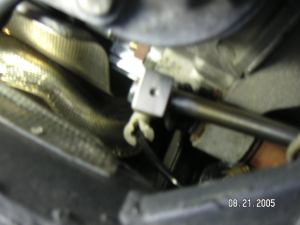
Item number 24 and 29 is what we will be replacing. The straight piece that pushes up against the cylinder piston (18) also need to be replaced. If you loose a rod on the road this piece is lost as well. Its Lamborghini part number 002134687. Since I did not have weeks to spare waiting for the part to arrive from Italy I decided to fabricate my own. It is nothing more than a straight rod with one rounded end and 10mm treads on the other end. Starting with a steel bolt (106 mm long, 9.82mm wide) I cut off the head and rounded it as shown in Figure 8. The length when done is 96mm. It does not have to be exact. The straight rod is then screwed into the Custer clutch rod as shown in figure 9 and 10 so that the shortest distance between its rounded tip and the center of the hole on the other end is 4.38". Ok, with the arrangement in figure 9 we will insert it into the slave cylinder in the car. The slave cylinder has a simple piston inside it. When the rod brakes it gets completely pushed out of the slave cylinder. Fortunately it is trapped by the rubber boot that covers the end of the cylinder as shown in figure 11. Using your finger you can manage to push the piston back into the cylinder. However first you need to let the air out. You do this by opening the air bleed on the front of the cylinder. It is covered with a small rubber plug that comes off. Open the screw just a little, too much and oil will run out. Now push the straight rod part of our assembly into the hole in the rubber boot forcing the piston all the way forward. The further forward you get it the more foot pedal movement you will have on the clutch. Before you attach the front end of the rod to the clutch lever and insert the bolt, spray the lever joint where the nut goes with WD-40 (fig 13) and insert connecting bolt with washers. Tighten these well (fig 14). The rod is now secure and held in place (fig 15). Even though it looks like a flimsy arrangement it cannot come out. The rounded end of the "straight rod" (see above) fits into a grove in the center of the piston in the slave cylinder. We are not finished yet however. We need to get any and all air out of the clutch hydraulic system. There are many brake fluid draining devices on the market and can be found at any auto-store. Figure 16 shows one. It is a container where you pump up a vacuum and you attach the red tip to the brake (or in this case slave cylinder) air bleed. However first you have to access the brake/clutch oil reservoir. This is located behind the front trunk of the car. Using an Allen wrench (fig 17), open the 8 screws and remove the panel. For 6.0L Diablos, the brake and clutch oil reservoir can be easily seen (fig 18). While the main function of the reservoir in 6L Diablos is to store brake fluid for the master brake cylinders below it, on the side of it is a tube that connects directly to a second piston system that is used to drive the clutch. This clutch master cylinder is hard to see. Its position is indicated in figure 19. On earlier cars the clutch master cylinder has its own reservoir and it is positioned direct above the clutch master cylinder. Both reservoirs use the same type of oil. Open the oil reservoir and fill it with DOT4 brake oil. You should use brand name DOT 4 (SAE J1703) brake oil. Lamborghini recommends "ATE TYP 200". I use Castrol GT-LMA oil. It is very difficult to get oil into this cylinder. Note. Brake oil dissolves paint. So take care. I like to surround the reservoir with a towel to collect drips (fig 20) and use a kitchen a kitchen turkey dripper (fig 21) to add oil. Opening the slave cylinder air bleed can be difficult. There is not much room in there. I found a flexible socket wrench adaptor to be very useful (fig 22). With the air bleed nut of the slave clutch cylinder open attach the vacuum system described and draw oil out of the reservoir until no further air bubbles appear. From time to time you will have to top up the oil reservoir. Release the vacuum. Then have somebody press on the clutch pedal. No air should be trapped in the oil coming out of the slave cylinder. Tighten the air bleed nut and put back on the rubber cover. If the above is done correctly when a person presses the clutch the clutch lever should move at least one inch - see figures 24 and 25 below. Test the car with care when done. The clutch pedal should always feel firm. The clutch rod should be slightly loose when the clutch is not pressed. Good luck. As always, if the above is difficult for you to understand. Do not attempt replacing such a rod yourself. Bring it to somebody that knows what they are doing. Clutch failure can lead to serious accidents!
|
|||||
 |
 |
 |
|||
| Fig 2. Arrow points to broken clutch rod | Fig. 3. Lamborghini replacement rod |
Fig 4. Extra washers to strengthen
rod.
|
|||
 |
 |
 |
|||
| Fig 5 Moving a Diablo clutch lever | Fig 6 Custer Diablo clutch rod | Fig 7 Close-up of "tread area" | |||
 |
 |
 |
|||
| Fig 8. Straight rod | Fig 9. Straight rod attached | Fig 10. Straight rod attached | |||
 |
 |
 |
|||
| Fig 11. Rubber boot over end of slave cylinder | Fig 13. Spray joint with WD-40 | Fig 14. Tighten connecting bolt. | |||
 |
 |
 |
|||
| Fig 15. New rod in
place
|
Fig 16. Device to drain oil/air from clutch cylinder | Fig 17. Allen wrench to open screws for panel in trunk. | |||
 |
 |
 |
|||
| Fig 18. Brake & clutch oil reservoir | Fig 19. Location of clutch master cylinder | Fig 20. Towel to collect oil drips | |||
 |
 |
 |
|||
| Fig 21. Kitchen
turkey dripper to add oil
|
Fig 22. Flexible attachment to open air bleed nut | Fig 23. Oil/air draining of slave clutch cylinder | |||
 |
.jpg) |
||||
| Fig 24. Normal clutch lever position | Fig 25. Position of clutch lever when clutch pedal is pressed. | ||||