|

|
|
|
|
||
How to Remove and Replace the Tail Lights on a Gallardo
|
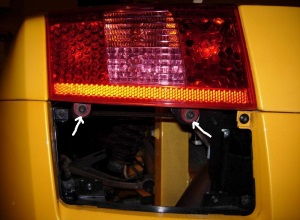
By Rick Schue. The tail light is held in place by four screws. Two of which can be accessed by removing the honeycomb grill under the tail light. Use a TORX T25 driver to remove the two screws shown in figure 1. Now for the fun part... The other two
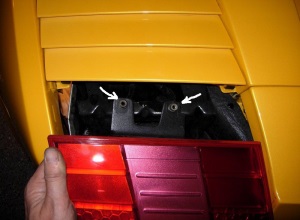
screws are up under the rear wheel fender vents, as shown in figure 2. To
access these, you will need to jack up the rear of the car and remove the
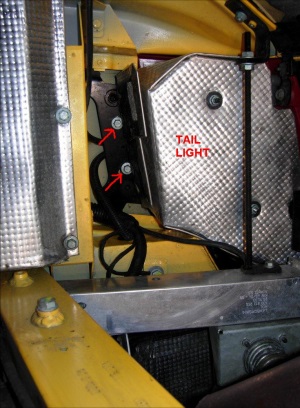
wheel and rear fender liner. Once this is done, you will see the two bolts
immediately in front of the tail light heat shield. See Figure 3 below.
This picture was taken by looking directly up into the car.
|