Lamborghini Logo
   HomePicture GalleryNewsRepairsCar PartsHistoryCars For SaleWeb SitesSite Index
   

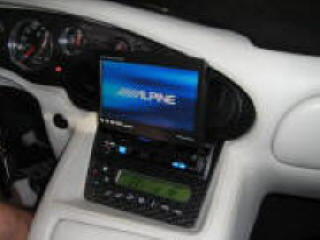
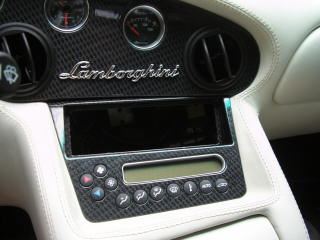
Installing an Alpine NAV System in a 1999 Diablo
When GPS Navigation systems came out in the 90's one of the first systems in general use was the Alpine NAV system. Alpine used the Lamborghini Diablo as their model cars in its company brochures. While somewhat bulky and complicated by today's standards to install, it still has an excellent display and a great audio sound.

For those that wish to "do it yourself" Rick Warwick has submitted this account of the Alpine system he installed in his '99 Diablo.

He installed a system consisting of an Alpine IVA-D310 flip up LCD, an 
Alpine NVE-N872a Navigational unit and a Crimestopper rear view camera. His Diablo already had an after market radio with a hideaway unit in the trunk when delivered. This was an upgrade from that unit Lamborghini supplies in these cars. 

Figure 1. 1999 Diablo with Alpine NAV System
The factory radio size is single "DIN", so as long as you buy a single DIN flip-up dvd-tv-radio for your Diablo and not a double DIN unit it will fit into the dash of the car fine. "DIN" refers to the height of the unit in the dash. Older cars often have a single DIN height for the radio. This means the face plate of the radio is about 2 inches high. Recent cars are often 2 DIN units. That is the height space for the radio is twice as high as the older 1 DIN units. height.  Depending on your factory set up (this car had an alpine unit) the radio was easy to remove. At the passenger side, near the floor there is room to fit your hand behind the radio and push it out. In some cars there is a screw back there as well which has to be removed first.

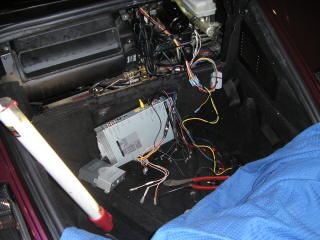
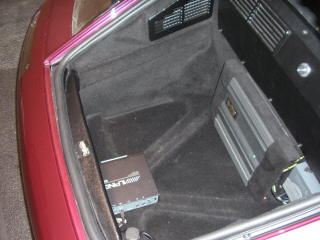
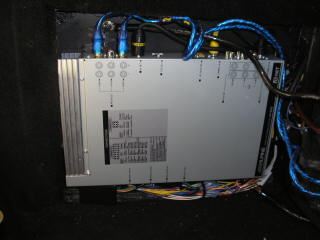
Remove the radio. Almost all of the wires you will need will be found here as well. Depending on your choice of new navigation system your installation may vary from what I have here. A flip out display that not only flips but slides forward is necessary because the Diablo dash is angled slightly can get in the way when the radio is in the open position.

Alpine supplies a detailed wiring diagram for anybody to install the system in a car that has a basic knowledge on auto electronics.

I found a grommet large enough to run my wires from the LCD display thru the "firewall" behind the wiper motor in the front trunk of the car. This may have been created by a previous installer. I am not sure.  Regardless, this would be a good place to drill a hole (if needed). Using a long wire tie I snaked all my wires through here. I found the front trunk a great place for most of the Alpine equipment as the interior lacks sufficient room to install anything.

The only wires that were not in the radio harness were the VSS, REVERSE, and the PARKING BRAKE. I found the vss at the back of the speedometer. There is a 3 wire plug. The black with red wire was the vss. The parking brake wire was found at the switch at the brake itself. For the reverse wire I simply used the rear backup lights wire. I did this for 2 reasons.  First I  do not have the Diablo wiring schematics for this car and was unsure if this wire was accessable in the interior; Second I installed a rear view camera. This make a great addition to the car since without it is is sometimes  very hard to see behind the car. This camera needed power from the reverse light lead as well which I had already located in the rear of the car.  The camera  itself cost $250.   The camera, (figure x), is shaped like a license plate holder. I found the factory mounting brackets flimsy and not acceptable. I replaced them with 1/2"x1/2" aluminimum square tube mitered at 45deg. at each end. This allowed access to the back of the holder nuts through which the wire could could also be run.


There is a grommet behind the drivers seat. Remove the glove box and the grommet is exiting to the engine area of the car. You must remove the drivers rear wheel and inner wheel well to access the other side of this gromet. This is a great time to zip-tie the wiring the sub-frame along the top of the cavity. Let the wire exit the rear near the lower radiator. Remove the radiator screen an continue to secure the wire.

Note, there will be a learning curve when programing the vss to the Alpine GPS system. Drive for a mile or so will correct any factory installed setting on your system.


Figure 2. OEM Radio   Fig 3. Trunk during installation   Figure 4.  Alpine control system installed
   
Figure 5. CD changer already in car. Can be hooked up to Alpine system.   Figure 6. Alpine control unit. Contains radio electronics and NAV electronics.   Figure 7. Finished Alpine system.


This page was last modified on 03/12/2014

This page was last modified on 09/06/2014