 |

|
|
|
|
||
Diagnostics and Repair for Fuel Injectors on a Diablo
Fue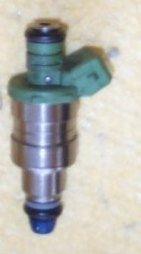 l injectors play a critical role
in delivering the high performance standards to the engines of these cars.
Unfortunately they have a history of failing. The good news is that you
can quickly do a few simple tests to identify a faulty injector. The
Left or Right "Check Engine Light" is usually your first indication that
something is wrong. The tests here then will help you identify the
faulty candidate(s). l injectors play a critical role
in delivering the high performance standards to the engines of these cars.
Unfortunately they have a history of failing. The good news is that you
can quickly do a few simple tests to identify a faulty injector. The
Left or Right "Check Engine Light" is usually your first indication that
something is wrong. The tests here then will help you identify the
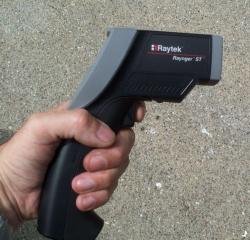
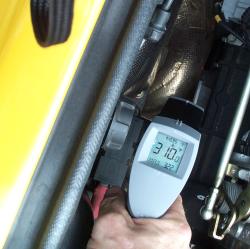
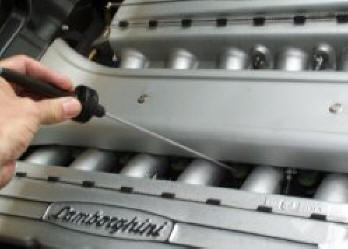
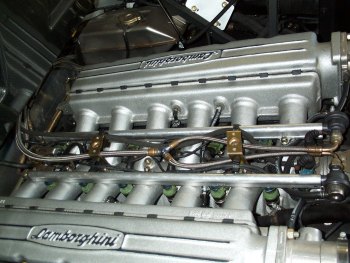
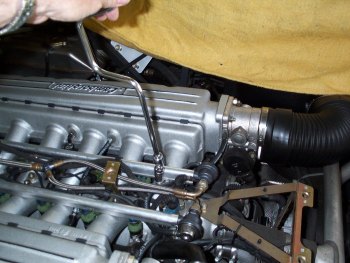
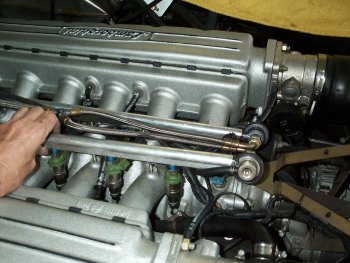
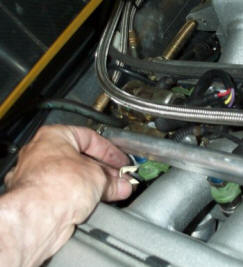
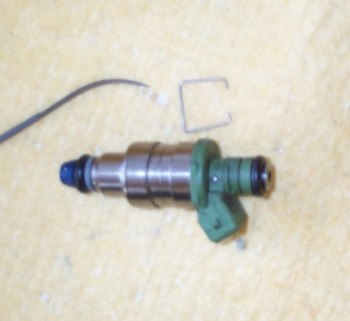
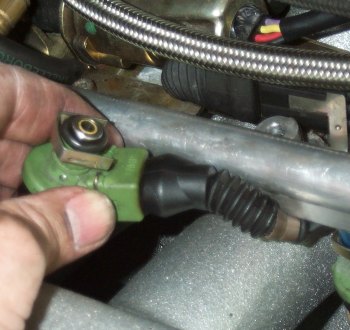
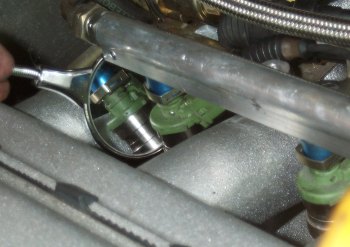
faulty candidate(s).Measuring Exhaust Temperatures. If a fuel injector is stuck open or close (this has been seen many times on 6.0L Diablo cars) the following will happen. Stuck open will cause raw fuel to dump into cats causing a rich condition and overheat cats and shut down power. The "Check catalyst" light will come on. If instead the injectors are stuck closed this will cause no burn (power loss) situation and excessive oxygen will get into the cat and cause a lean cat to overheat. Again the "Check catalyst" light will come on. In both situations there is a dramatic loss of power as the LIE computer is trying to correct the situation. It there is a closed injector the temperature on the exhaust manifold will be low. On a car where the cylinders are fine the manifold temperature will typically 400-450 F immediately external to the heads. Fortunately there is a simple way to measure these temperatures. There are a number of IR/heat sensing guns available these days. Figure 1 shows one example. These guns contain an IR detector that measures radiant heat. A laser beam points to the pot being measured. The LED display gives the reading within a few seconds. To use first point the gun on your hand and take a reading to check the gun is working correctly. It should read 98.6F Then point the gun's laser spot on the cast iron surface of the exhaust manifold of each cylinder as shown in Figure 2. When the engine is warm. All cylinders should be the same (+/-) 30 degrees. Typical readings are 450 degrees F. A blocked injector will give a reading of 200 to 250 degrees F. while an open one will give temperatures of 600 degrees or more. Sound Measurements. There is an even simpler method to diagnose fuel injector problems. Most auto stores these days supply engine steascopes. One example of one is shown in figure 3. To check each injector position the tip of the scope on each injector as shown in figure 4. A good injector should emit a distinct clicking sound. If you do not hear this or hear a purring sound chances are the injector is faulty. Removing a Fuel Injector. Removing a fuel injector is not difficult but does require time and care. On the Diablo all the injectors are fed from a left and right fuel rail, as shown in Fig 5. This rail contains gas at constant pressure, so the amount of fuel delivered to a cylinder is completely dependent on how long the fuel injector stays open. To remove and examine a fuel injector: First loosen and remove the 5 retaining screws that hold each fuel rail to the engine. See Figure 6 below. Do not disconnect the fuel injectors from the rail or the connecting wires at this time. When all the screws are removed simply raise the whole rail vertically from the engine. Rock or twist each fuel injector if they are tight. The whole assembly comes up as one piece as shown in figure 7 below. To remove an individual injector from the fuel rail you must then slide out the metal clip that holds the injector against the rail. They slide out on a grove as shown in figure 8 below. Fuel will gush out of the fuel rail at this point. It will stop after about 1 minute so take extreme care -- no smoking! Figure 9 shows how to remove the electrical connection to the injector. Each injector has a wire spring clip that holds the electrical connection socket in place. Use a sharp point need to get under this spring to pry it off. Figure 10 shows an isolated injector. Recently I had an injector the failed the tests above. It was for cylinder 12 of my 6L Diablo. I switched injectors 1 and 12 and found to my surprise that I still did not get the correct sounds out of injector 12. I then examined the plug socket for this injector. Instead of seeing two silver contacts as shown in Fig 11. I sow only one as shown in Fig 12. What had happened is that the connection was pushed (or pulled) back up into the socket making no contact with the injector. The solution was to simply peal back the rubber hose covering the outside of the connector wire and push the wire back into the socket until it "clicked." The simple tests above identified this problem. It gave a check engine light warning and check catalyst signal. Inserting a Fuel Injector. Care also needs to be exercised in reassembly. First reinsert the metal clip that retains the injector to the fuel rail. It is absolutely essential that the injector is seated correctly back into the fuel rail socket. This rail has gasoline under pressure. You must hear a distinct "click" or "snapping" sound as you press the injector upwards into the fuel rail. If in doubt, try and remove it without removing the clip. It should not come off. use a mirror to see around the back of each injector. Next the whole rail is held over the engine so each injector is directly over its appropriate air intake hole as shown in figure 15. Gently press them all evenly into place taking care not to pinch any of the rubber rings in the process. Tighten down the retaining bolts and you are all done!
|
||
 |
 |
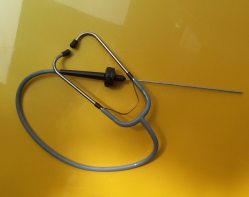 |
| Fig 1. IR Heat Sensor | Fig 2. Close-up of heat sensor in action | Fig 3. Engine stetascope |
 |
 |
 |
| Fig 4. Checking each fuel injector with an engine stetascope | Fig 5. Fuel rails and injectors. The injectors are green. | Fig 6. Loosen retaining screws that hold fuel rail on engine. |
 |
 |
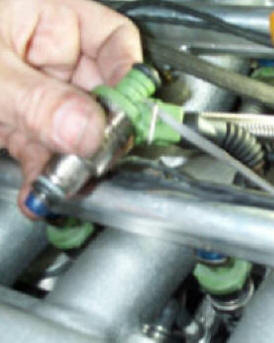 |
| Fig 7. Raise fuel rail vertically to expose injectors. | Fig 8. Remove retaining clip. | Fig 9. Remove electrical connection retaining spring. |
 |
 |
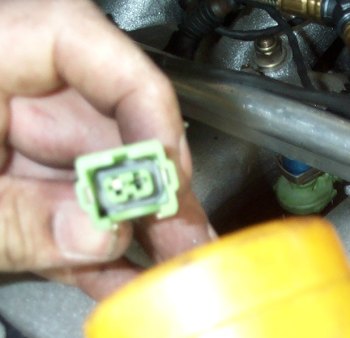 |
| Fig 10. Removed Fuel Injector. | Fig 11. Electrical socket showing two contacts | Fig 12. Electrical socket with only 1 contact |
 |
 |
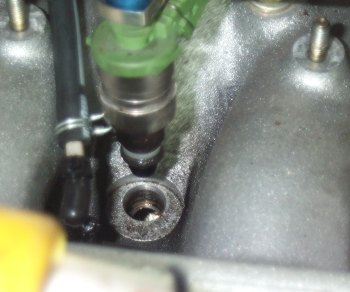 |
| Fig 13. Re-attach retaining clip | Fig 14. Check injector is seated correctly in fuel rail | Fig 15. Re-insert injectors directly over input hole. |