|

|
|
|
|
||
Cleaning Wheel Air Pressure Sensors
Each
wheel of a Diablo (and I assume later cars) has an internal sensor that
continuously tracks the air pressure in the tire. Should it drop below
about 28 PSI it will alarm the driver by switching on the "Tire Pressure
Indicator" light on the dash. The system is very useful. Lamborghini was
way ahead of its time in
 providing
such a system. What is even more remarkable is that the sensors
themselves do not need internal batteries. Instead they contain a magnet
and coil that generates enough current when the tire rotates to drive
the sensor. providing
such a system. What is even more remarkable is that the sensors
themselves do not need internal batteries. Instead they contain a magnet
and coil that generates enough current when the tire rotates to drive
the sensor.
The tire must first be completely removed from the wheel rim. This is required because when the sensor is reattached to the rim it must be balanced (see below).
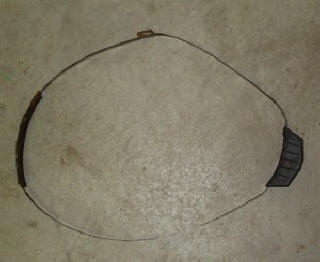
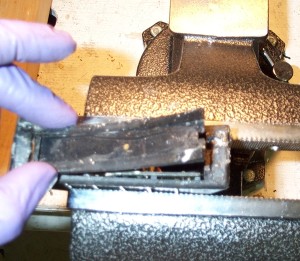
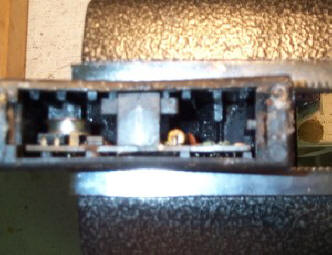
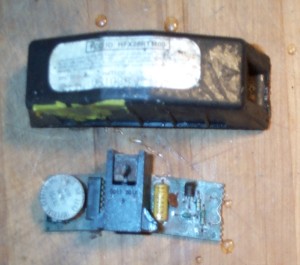
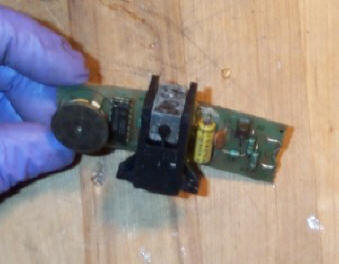
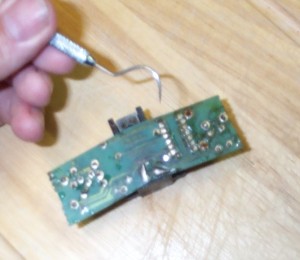
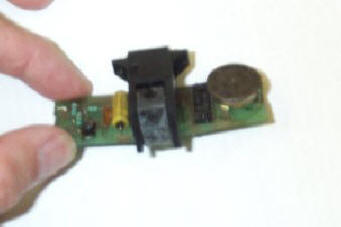
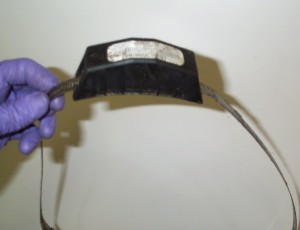
Figure 1. Wheel Air Pressure Sensor The sensor is strapped around the central region of the wheel using a gigantic hose clamp. Figure 2 shows one complete assembly on the ground. Note the metal counter weight on the opposite side of the sensor as it would sit on the wheel. If tire inflation foam was used to keep a tire inflated the whole apparatus is very sticky and hard to work with. The "hose clamp" is opened and slid through the sensor box. The sensor box is then pried open with a screwdriver on the inside. Figure 3 shows the electronic circuit board as it sits in the sensor box before it is removed. It slides right up and out. Figures 4 and 5 show a circuit board removed. The large object mounted in the middle of the board is the magnet and coil that once the wheel rotates generates power to drive the single transistor and IC chip on the board. The round circular coin shaped object is the actual pressure sensor drum itself. How compressed it is what the electronics on the board reads. Fortunately it is easy to clean this system up. Just run warm water over the board and carefully wipe it clean. The sticky foam washes right off. It may be necessary to use a probe to scrape between the IC pins to get rid of all "gunk". See figure 6. The whole circuit board should be free of any dirt and gunk before putting it back into the plastic holder which also needs to be cleaned. Figure 7 shows a clean circuit board. The board within the plastic housing is the re-treaded with the "hose clamp" and reattached to the wheel. The position of the metal counter-weight should be such that the rim is completely balanced before the tire is put back on. Check the system is working by driving (slowly) with un-inflated tire for a mile or so. The indicator light on the dash should come on. It can take a mile or so at slow speed for this to happen. Then inflate the tire completely and recheck. It should no longer be lit.
|
||||||||||||||||||||