 |

|
|
|
|
||
Window Worm Screw Repair in a Diablo
|
This report shows how to open up the door interior
of a Diablo. This was done because I had to correct a simple problem where the
red rubber sleeve covering the long flexible window worm screw that is used to
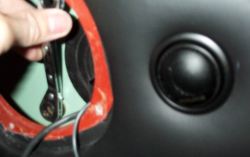
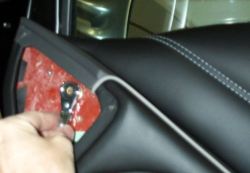
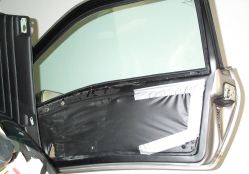
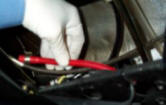
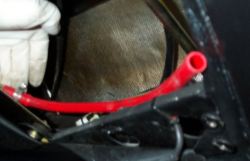
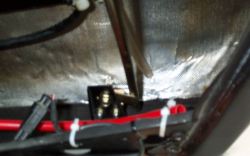
raise and lower the window came undone. The process of removing the door panel in a Diablo is shown in a series of photographs shown below. Care should be taken to carry out the process slowly and not to scratch the leather. The only part that is tricky is actually separating the door panel from the rest of the door. After all screws are removed (Figs 1 to 9), one needs to gently push the panel upwards for it to pop out. It can then be swung upwards out of the way as shown in Fig 10 with the speaker wires still attached such that one can get to the rest of the door's interior. The door is covered with a sheet of felt like material that his glued to the frame. It has to be cut to get inside. It can be patched afterwards with duct tape as shown in Fig10. It's not pretty but works fine. Figure 11 shows what caused my rattle problem. The flexible worm screw that is involved in raising and lowering the window had somehow worked the red rubber sleeve from itself. You had metal rubbing on metal. The Lamborghini tube clip had loosened. I simply put the red tubing back over the worm screw and used a regular hose clamp to keep it in place as shown in figure 12. To make sure the whole assembly did not rattle further I attached the screw and cover to the door frame with two wire wraps s as shown in Figure 13. Be sure to test that the window can be raised and lowered before reassembling the door. Also make sure no internal wires catch in the window mechanism.
|
 |
 |
 |
||
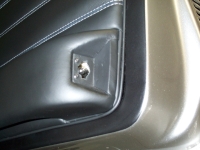
| Fig 1. Left door. Remove light cover to expose two screws. | Fig 2. Cover opened, remove two screws. | Fig 3. Pop out central plug with screwdriver. | ||
 |
 |
 |
||
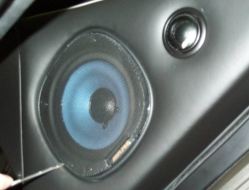
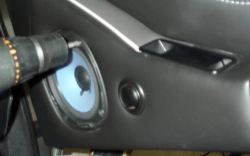
| Fig 4. Remove hidden large screw underneath plug. | Fig 5. Pop off speaker grill cover. | Fig 6. Remove four speaker screws. | ||
 |
 |
 |
||
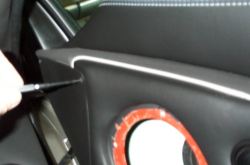
| Fig 7. Remove large bolt behind speaker. | Fig 8. Remove tree screws at top of door to remove triangle cover plate. | Fig 9. Remove final large bolt. | ||
 |
 |
 |
||
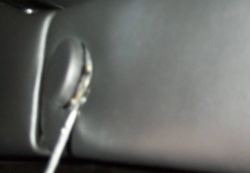
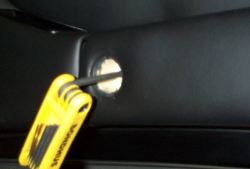
| Fig 10. Carefully remove leather door panel. | Fig 11. Worm screw shown with red cover removed | Fig 12. Rubber cover reattached to window worm screw. | ||
 |
||||
| Fig 13. Worn screw and cover attached to door frame to stop vibration. |