 |

|
|
|
|
||
Changing An Audi RNS-E Nav System Face Plate For A '06 Gallardo
Here's a step-by-step procedure to swap your '06 Gallardo radio with an Audi RNS-E to get a functioning navigation unit.
This information was presented on the
Lambopower
forum by "doltmo" (Rick Schue a regular user of the forum) and
is the basis of what is submitted here with his permission. Rick can
be reached at
rick@schue.com.
 |
Unless your car came with navigation, the navigation function of
your radio was disabled by the factory. Yes, all the electronics are
inside the box to do navigation, but it needs more than just a GPS
antenna and a database DVD. It needs to be reprogrammed to enable
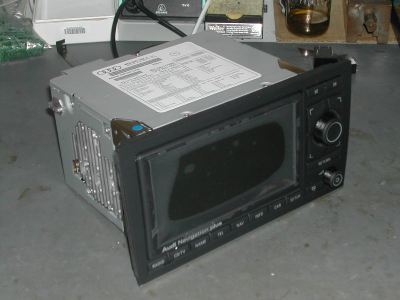
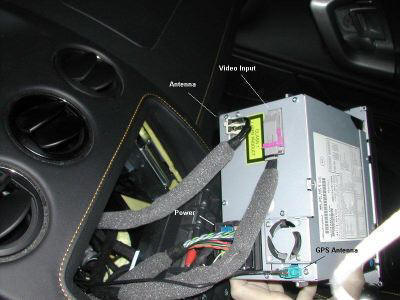
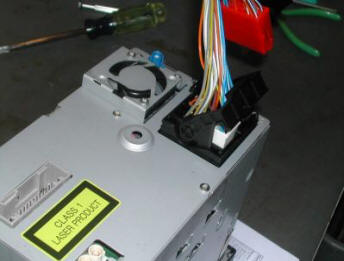
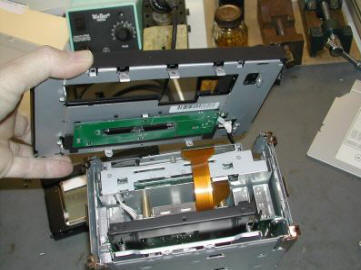
the NAV function. From my inquiries at my dealer, this will set you back around $5000 US. Audi RNS-E radio/NAV unit retrofit kits are available from several sources for prices in the $1600 range. A typical kit will include an Audi RNS-E radio, a DVD NAV disk, a GPS antenna, radio removal tools, and some adapter cables (which won't be needed). The only problem with these units is they don't exactly fit into the space for the radio in a Gallardo. The face plate is a little bit too wide. Some people simply file the edges until it fits. Another way described here is to remove the Lambo radio from the car, swap the face plate and LCD bezel with the Audi unit, and reinstall the Audi radio (with the Lambo face plate) back into the car. Figure 1 shows a typical Audi RNS-E radio. Note that it has a different face plate (is wider than the Lamborghini one). The LCD bezel also carries the "Audi" logo. |
|
| Figure 1. A Typical Audi RNS-E radio |
Step By Step Instructions:-
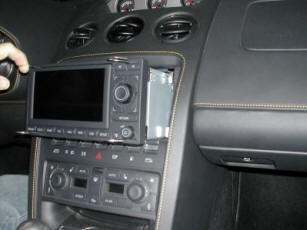
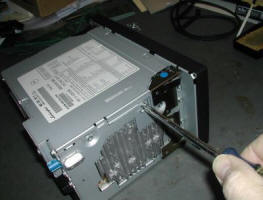
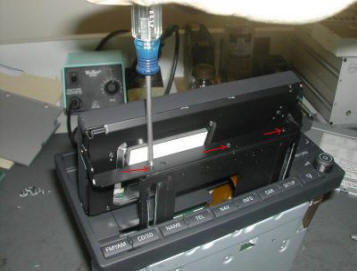
The first step is to
remove the Lambo radio from the car. Insert the
radio removal
tools into the slots in the face plate. The upper left slot is
difficult to see, since it is in the gap between the LCD bezel
and the face plate. (Figures 2 & 3).
IMPORTANT NOTE: once you insert the first removal tool into a
slot you have committed yourself to removing the radio. The removal tools can
only be removed from the radio after the radio has been removed from the car.
 |
 |
|
| Figure 2. | Figure 3 |
You will
hear each tool "snap" into position as you push it into the
slot. After all four tools have been inserted, pull the radio
out by pulling with equal pressure on all four tools. You may
wish to have a helper as it is easier to do with four hands. You
can do it solo by working each side out a little at a time.
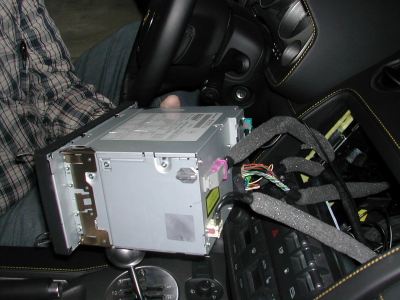
Once the radio is free of the car, you may wish to wrap it in a
cloth or rag to keep the sharp edges from scratching the
upholstery. Now comes the most
difficult part of the job - removing the connectors from the
back of the radio. It is much easier if you have a helper to
hold the radio while you remove the connectors.
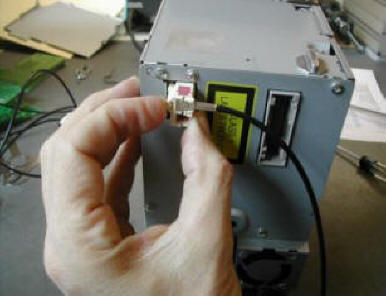
Each of the connectors has a secret release lever that you
must push to unlock the connector.
 |
 |
|
| Figure 4 | Figure 5 |
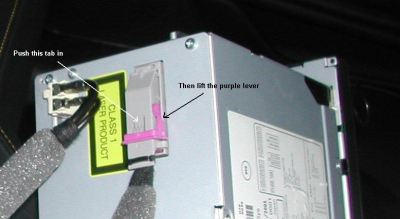
The gray video connector as a purple bail lever that is in turn held fast by a tab in the connector body. You will need to push in on the tab to free the purple lever, then lift up on the lever to release the video connector (Fig 7).
 |
 |
|
| Figure 6 | Figure 7 |
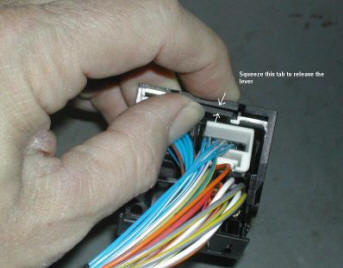
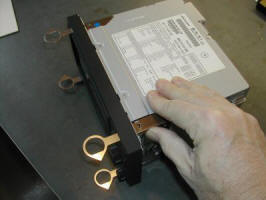
The large power connector also has a bail lever to release it from the radio. And this lever is held fast by a tab in the connector body. Here are some pictures of a similar connector Fig 8 & 9. Then lift the bail level to release the connector (Fig 9).
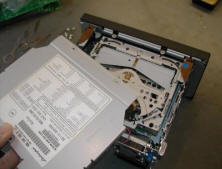
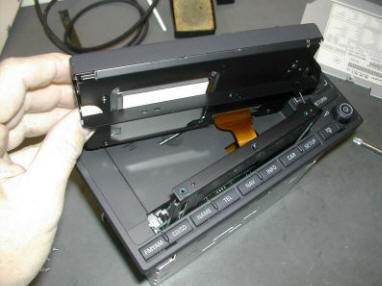
At this point the
radio is removed from the car. The next step is swapping the
face plate and LCD bezel.
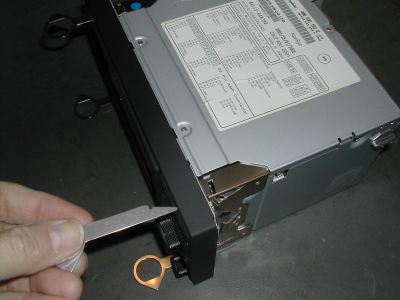
Remove the removal tools from the radio by pressing in on the
brass locking springs on each corner and then pulling the
removal tools out (Fig 10 & 11).
 |
 |
|
| Figure 8 | Figure 9 | |
 |
 |
|
| Figure 10 | Figure 11 |
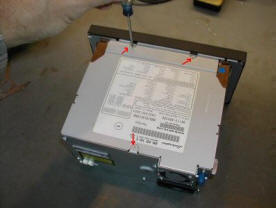
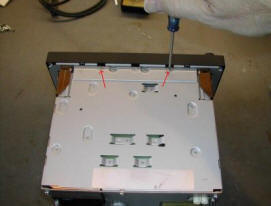
Next, remove three small screws from the top lid, as indicated in Figure 12. Then remove the screw shown from each of the sides.
This will free the top lid (Fig 13). Remove the top lid and set it aside (Fig 14).
 |
 |
 |
||
| Figure 12 | Figure 13 | Figure 14 |
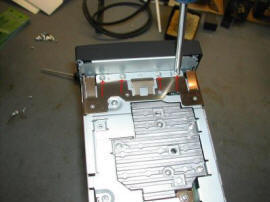
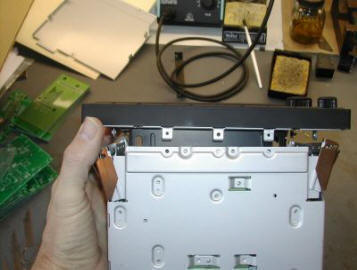
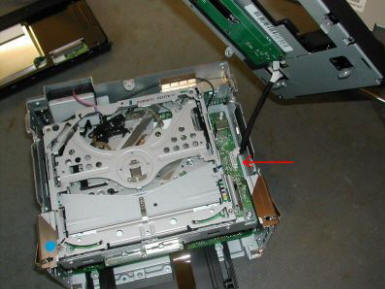
Next, flip the unit upside down and remove the screws shown on the bottom of the chassis (Fig 15).
Then remove the four screws indicated from each side of the radio (Fig 16).
Now gently pull the "ears" out away from the radio chassis as shown. Do this on each side of the radio (Fig 17).
 |
 |
 |
||
| Figure 15 | Figure 16 | Figure 17 |
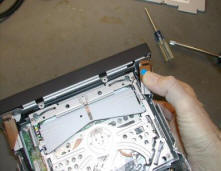
Then stand the radio up on it's rear panel, as shown (Fig 18), and gently wiggle the front panel out from the chassis. While you do this you will be forcing the LCD tilt mechanism to release it's grip on the LCD , so you will feel some resistance. Don't worry, you're not going to hurt anything.
 |
| Figure 18 |
At this point you can begin to see the LCD tilt mechanism as the black tray visible between the front panel and the radio chassis.
At this point, stop. Push the front panel back down against the radio chassis and the LCD will tilt out from the panel (fig 19).
Then grab a hold of the bottom of the LCD bezel and pull the LCD the rest of the way out.
It may be easier to pull up on the slide tray at this point, as shown in the photo below (Fig 20).
 |
 |
|
| Figure 19 | Figure 20 |
Note: these may be "Loc-Tite"-ed in, so use a very, very good
Philips screwdriver with a small point. If you bugger up the
heads of these screws you're "screwed".
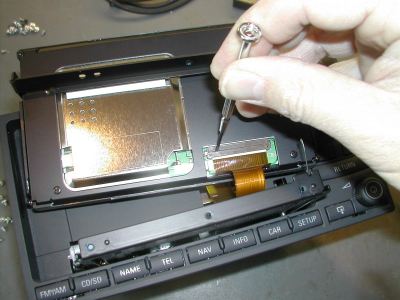
The LCD is then free of the tilt mechanism, rotate it slightly
so that the retention pins are free of the grooves in either
side of the face plate (Fig 22).
 |
 |
|
| Figure 21 | Figure 22 |
 |
 |
|
| Figure 23 | Figure 24 |
 |
 |
|
| Figure 25 | Figure 26 |
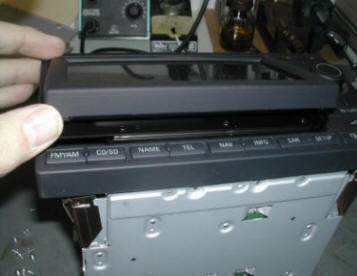
Remove the connector. The front panel is now free of the radio.
 |
 |
|
| Figure 27 | Figure 28 |
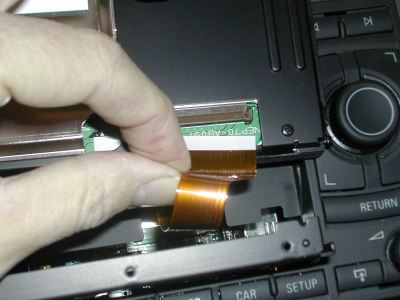
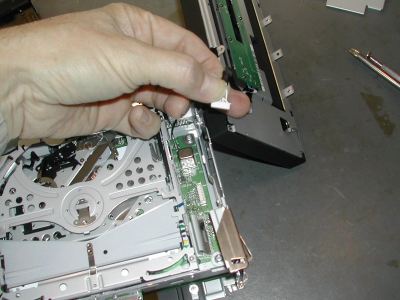
Now perform the same surgery on the Audi "doner" radio. Install
the Lambo front panel onto the Audi radio using the reverse of
the removal process shown above. Install the Lambo LCD. Use
extra care when reinserting the flex circuit into the connector.
Make sure the flex circuit is fully seated, then push the bail
bar back into place. Reassemble the radio. Install the GPS
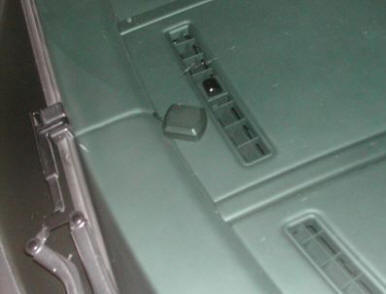
antenna (see another post below) Then reinstall the radio into
the car. I've located my GPS antenna on top of the gauge cluster
right next to the windshield (Fig 28).
Remember these radios have an internal security system that
requires a 4-digit code to be entered anytime the radio is
removed from the car. Make sure that the Audi radio you acquire
comes with this code. When you bring up the NAV screen for
the first time, you will not be able to access maps or get route
information until the GPS system finds the satellites. This
takes 10 to 15 minutes - maybe more. After this
"get-to-know-you" process with the satellites, it will function
normally.
The Audi radio has a power-on screen that shows the Audi logo.
This can be changed to the Lambo logo with some reprogramming
via the
VAGCOM datalink.
The supplier of your retrofit kit should be able to pre-propgram
the Audi unit to power up with the Lambo logo prior to shipping
the kit to you. Ask him. When the logo is switched to "Lambo",
you may lose satellite radio functionallity. Ask for details.
To get the navigation prompts in the multi-function LCD in the
instrument cluster (between the tach and speedo), you will need
to have some additional VAGCOM programming done to the car. This
tells the multifunction LCD to display NAV instructions when a
guidance is active. Ask your kit provider how best to accomplish
this.
The DVD disks used by the Audi NAV unit are different from the
Lambo DVDs. You will need to get an Audi NAV disk should you
ever wish to update the map data. The Audi DVD's will show you
the locations of all the Audi service centers - they will not
show you the Lambo service centers (like there are that many
anyway!).
You may wish to retain the original Lambo radio carcass in the
event you ever need to put the original unit back into the car.
There is one outstanding forum on the web that is loaded with
information about Audi NAV systems and radios. It's called
navplus.
Read this site carefully before undertaking work like this
if you are not familiar with these systems.
Finally another alternative is to replace your Audi radio with
an Eclipse Navigation Systems. This is described
elsewhere on this
site.