 |

|
|
|
|
||
Complete Coolant Change In A Gallardo
| "Carbuff" sent me the following great
write-up. It also appeared on the Lambopower Forum. This is the exact procedure to remove ALL old coolant from the enormous Gallardo cooling system. My quest was to remove 100% of the coolant. 95% was just not good enough. I bought my Gallardo with green Napa coolant in the system, and I wanted to return it back to its proper VW G11 blue coolant. First, if you do not know what you are doing, do not attempt this maintance yourself. You have been warned. That being said, here are the major steps. Round up the necessary tools. Empty 5 gallon jerry can or similar container - for old coolant recycling 3 gallons of VW part # ZVW-237-105 G11 coolant 2 gallon jugs of distilled water Ratchet set Garden hose Funnel white card board. tools to remove trunk liner Esco flat top jack stands (from Steve at ultimategarage.com), or equivalent. Step 1: The G takes 21L of coolant. I wanted a 60% coolant/40% water mix. That means 12.6L of coolant and rest distilled water. So off to the VW dealer for coolant you go. Important note: our G is an 04 car. The early cars use the blue G11 coolant, while later cars may use pink G12 or purple G12+ or G12++, so make sure you get the right stuff for your car. Step 2: If you live in an area with soft water, your flush will be ideal, as flushing with soft water is best. Get 2 gallon jugs of distilled water for the refill. Do not use tap water unless you live in an area with soft water. I do not mean soft as in water softener (which just replaces one nasty mineral for another that feels better on your hands). I mean water with naturally few minerals in it. Step 3: Remove trunk liner. If you do not know how, give up here and return coolant to dealer. Step 4. Raise your car. Like this, or on ramps. Securely, or you will get crushed underneath. Use jack stands or wood with a floor jack. I prefer to use both. Do not trust floor jack, or anything hydraulic without a manual pin. Nobody ever returns a faulty jack or jack stand....wonder why? 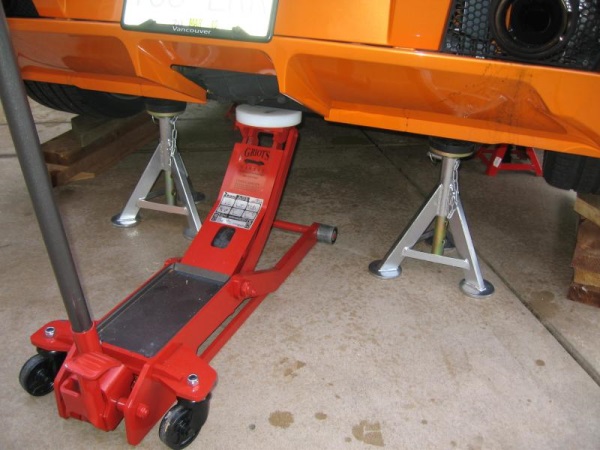 Step 5: Make sure coolant is cold. Never open a hot coolant reservoir cap, unless you know what you are doing. Step 6: No pic taken, but locate 2 coolant drain plugs side by side mid center rear underneath car, located on aluminum coolant pipes. Get catch pans ready, large enough to hold about 18L of fluid, so use 2 small or one huge. Open top-up reservoir (slowly in case there is any pressure). Remove plugs, one at a time, and allow old coolant to drain. Do not loose crush washers on these plugs. They are reusable. Once drain is to a trickle, open second drain plug. While fluid is draining, Locate and remove 2 banjo bolts off top of the front radiators. These hold front radiator air purge tubes leading back to coolant reservoir. Note position of bolts and tubes. If not paint marked, place paint marks on them to help with proper torque on replacement. Water will also trickle out of the 2 small return tubes you just released. Place white card behind banjo bolts. This will a) allow you to see minute color changes of fluid, and protect the electronics directly behind these banjo bolts  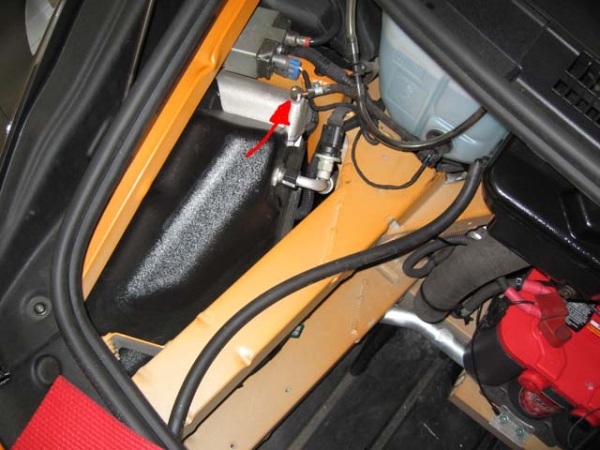 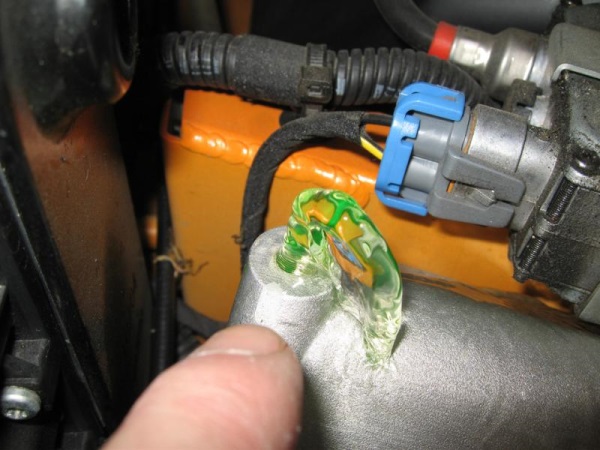 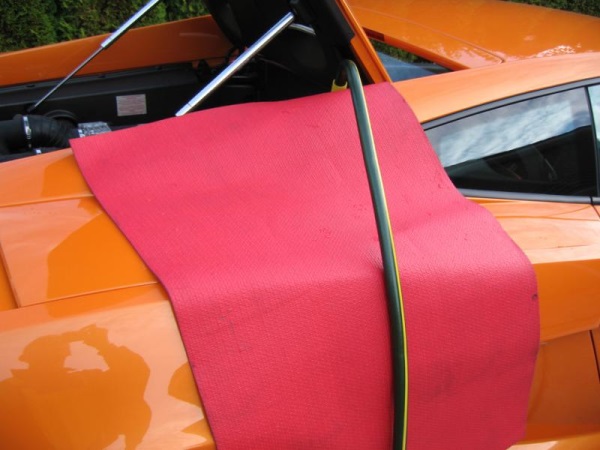 Step 7: Protect side of Gallardo with mechanics blanket, which is the same as a rubber yoga mat. Steal your wife's, or buy one to match the color of your car. Step 8: Remove full pans of old coolant, and dispose of into jerry can and take to recycling. Do not dump down drain. This stuff is toxic and will kill fish. Dogs like to lick this sweet deadly treat, so caution here also. Take a garden hose, and start filling up the coolant reservoir. Control water flow so that water draining out equals water going in.  Now old coolant/new water mix will start to pour from underneath of car. Start car periodically while water is running, so that the thermostat opens and allows flushing out of all coolant passages. Cycle engine on 15 minutes/off 15 minutes. This can take hours to fully flush the system this way. Caution: do not allow coolant reservoir to empty while running car. This can cause catastrophic engine overheating. Also, water must always be on, to avoid drastic temperature changes in the cooling system. Watch for coolant coming out of front radiators. Once water runs clear like this, you are getting closer to having a good flush. 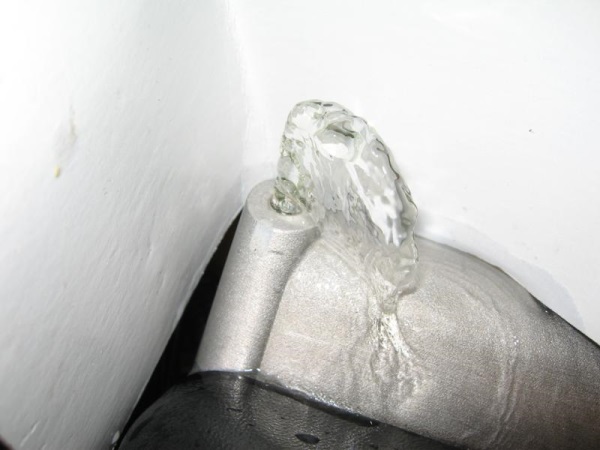 IMPORTANT: the water out of the air purge tubes and banjo bolts may run clear, only to return to color when the car is started. This is normal, and tells you that there is more coolant hiding in the system. Repeat flushing. Step 9: Once water is crystal clear, stop water flow, replace banjo bolts and coolant drain plugs. Now here is the tricky part. You are now left with about 9L of tap water in the cooling system. Where is the 9L hiding, nobody knows, but it is there. It you live in an area with hard water, you have 9L of hard water in your cooling system. Too bad. Tilting the car or starting it has no effect on purging the remaining water. Just live with it. You will be diluting with distilled anyway, so it is not a big deal. Step 10: Since you have a ton of water trapped in the engine, you will need to add your 12.6L of coolant (60/40 mix) or 10.5L (50/50 mix) first before you add any water. This is to make sure you get the right amount of coolant in. You may notice that the reservoir fills up before you add 12.6 L of coolant. That is because there is a ton of air trapped in the system. Step 11: Check for leaks on drain plugs and banjo bolts. Step 12: Start car. You will notice that almost immediately the level of coolant starts dropping. Add remaining coolant. Then start topping up with distilled water. Max level is 5cm below top of reservoir neck, so do not overfill. Once the car is running and gets up to normal operating temp (about 90C), check level, top up, and shut off car. Close reservoir cap. Step 13: Replace trunk liner. Clean up the mess on your driveway. Step 14: Let car cool down. Open reservoir cap, and fill reservoir to within 5cm of top of reservoir neck. Do not overfill. Step 15: Run car up to temp, and repeat step 14. By now, this should have purged most of the air out of the system. Step 16: Repeat steps 1-15 in 24 months. I am sure that I missed describing some obvious steps, but I assume that if you tackle this job, you already have some basic mechanical experience. |