|

|
|
|
|
||
Oil Leak in a Gallardo
|
||||||||||||||||||||||||||||||||||||||||||||||||||||||||||||
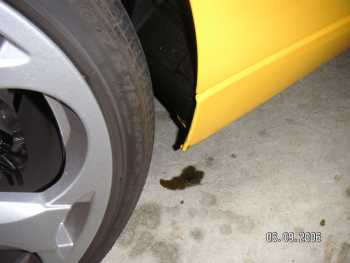
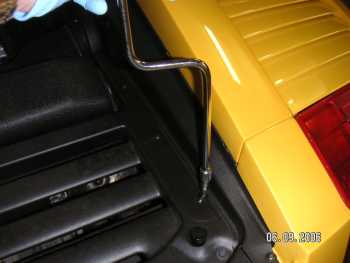
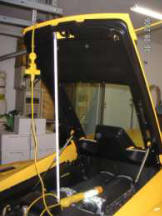
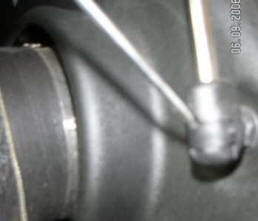
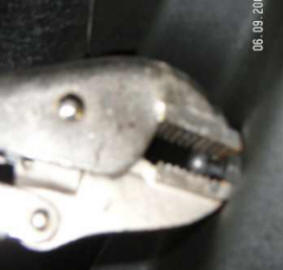
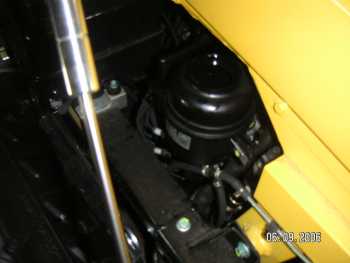
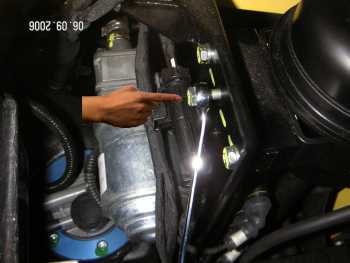
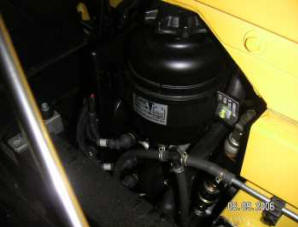
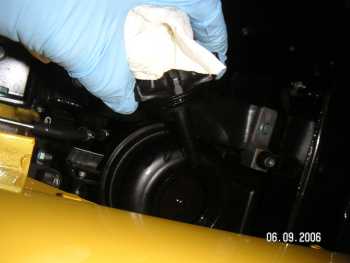
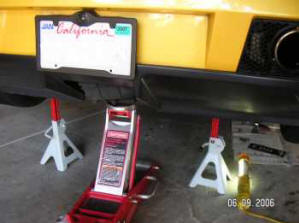
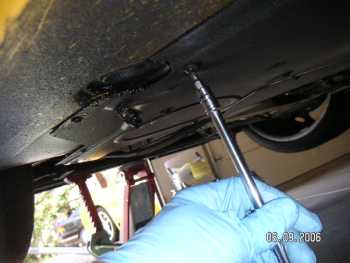
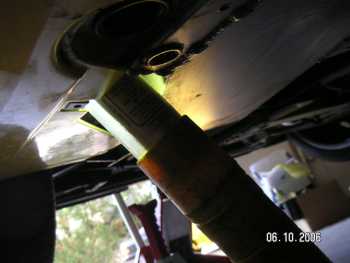
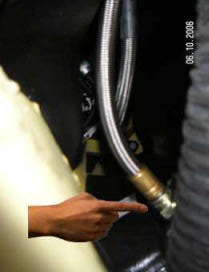
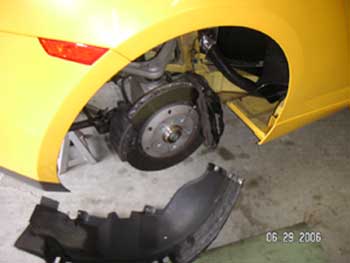
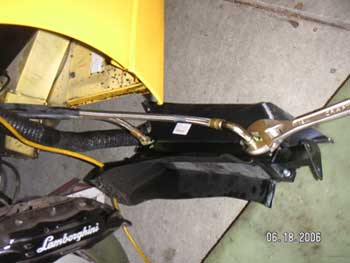
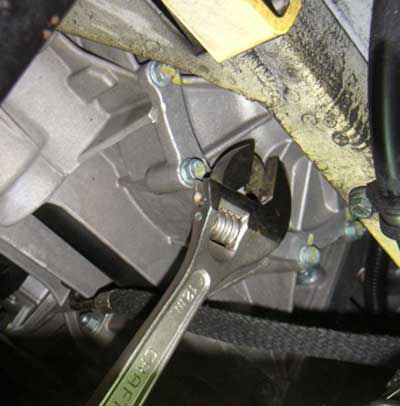
Figure 6 shows the e-gear oil reservoir. You cannot reach in and open the top fill cap. There is not enough room for it to come off. The whole reservoir assembly slides out (toward the engine) when a bolt shown in figure 7 is loosened. Figure 8 shows the position of the assembly when it is slid out. Now we can screw off the cap and examine the fill level. The correct level is shown on the reservoir. In this case the reservoir was at its correct level. I also examined the tubing and joints around the pressure control valves of the e-gear system. I was relived to find them all dry and clean. Based on this, I concluded the oil on the floor did not arise from this location. Directly under this area is the gearbox oil cooling radiator. I checked the gearbox oil level. It was a little low (just below the level in the side draining port). I now suspected that the right hand side oil radiator was the culprit. To get to this I raised the car and removed the lower panel on the bottom right hand region of the car, figures 10, and 11. I then pushed a light into the narrow space as shown in figure 12. I could then look in to see that there was oil on the hose joint connected to the bottom of the oil radiator -- see figure 13. The nut was slightly loose. I tightened it half a turn and cleaned up with a paper towel all the oil spilled in the area. Even the bottom panel had oil on it. Everything must be clean and dry otherwise dirt accurate. To be absolutely sure the joint did not leak I wrapped a paper towel around the tube/nut, taped it in place and drove for about 30 minutes. Then to be sure I corrected the problem before re-installing all the panels etc. I examined the paper towel. It was clean and dry! However there was fresh oil on the floor of the side runner panel. I suspected that the top radiator hose joint might also be loose. To get to this joint I removed the wheel and wheel well cover (fig 14). Figure 15 shows the top oil duct coming out of the gearbox oil radiator. It too had oil around it. It turns out it is easy to remove this radiator from the car and tighten the hose connections properly. The radiator is attached to the car by two bolts at the top and two of the bottom. Removing these allows on to take the radiator out and examine it in detail as shown in figure 16. Both hose nuts were carefully tightened and the radiator reinserted back into the car. Again I wrapped a paper towel around the joints and drove the car to make sure it was not leaking oil. When I was sure of this I reinstalled the wheel panel and clean up spilt oil. It was also necessary to add some gear oil to the gearbox. I used SAE 75w/90 gear oil. Lamborghini tells you to add the oil by removing a nut at the top of the gearbox. I found this nut hard to detect and impossible to get at to open without removing a lot of stuff around the engine. Easier is to open the "check level" nut at the side of the gearbox (fig 17). The oil should be to the bottom of this port. Mine was below when I stuck my finger in. Using a large syringe and tubing I "injected" slowly oil into this location of the gearbox until it started to overflow out this port. It took about 1/4 qts. The total gearbox capacity is 4.2 quarts, so presumably no harm done. I drove the card hard for about 50 miles and made sure the problem was solved this time. It was. BTW, since the car is less than 9 months old, I attribute this to a factory oversight problem!
|